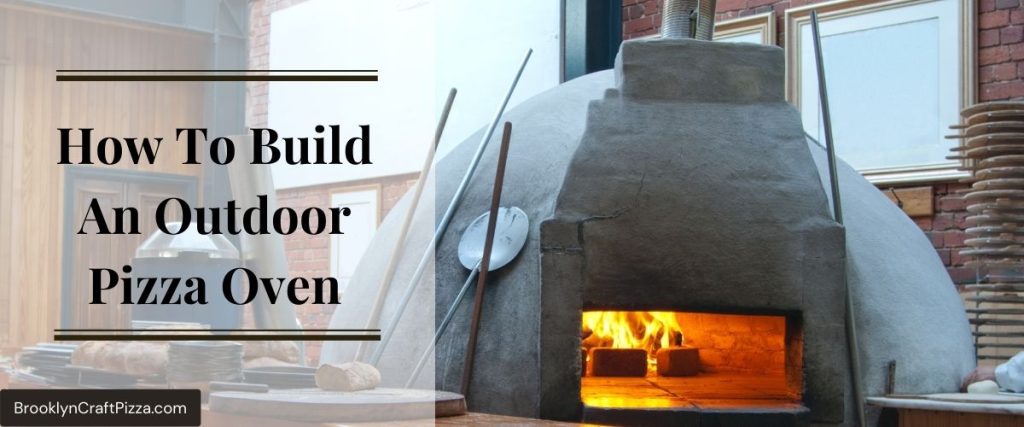
Detailed Guide: How To Build An Outdoor Pizza Oven
If you’re looking for a way to improve the quality of your pizza and spend time with family or friends, then building an outdoor oven might be just what you need!
It’s not always easy to find the time or the right ingredients for a home-cooked meal, but it is possible. You can create your own pizza oven with just some bricks and metal sheets.
This DIY project will allow you to cook delicious pizzas in your backyard without having to spend any money on an expensive oven! Check out this blog post for instructions on how to build an outdoor pizza oven!
In this blog post, we’ll discuss how to build an outdoor pizza oven from scratch. We’ll also provide some tips on getting started as well as design considerations. The best part is that it’s not too difficult and can be done without any experience in carpentry.
However, if you want to make things easier on yourself, we suggest hiring a local contractor who specializes in home improvement projects like these. They should know what they’re doing and will do the work faster than someone who doesn’t have much experience working with wood or metal materials.
What Is An Outdoor Pizza Oven
Before learning how to build an outdoor pizza oven, you should know the basics of an outdoor pizza oven.
An outdoor oven is a type of oven that can be used to cook food outside. The reason it’s called an “outdoor” oven is because you are using natural or ambient heat rather than using gas or electricity.
If you use your regular kitchen oven for this purpose, then the flavors won’t taste the same as they would in a true outdoor oven.
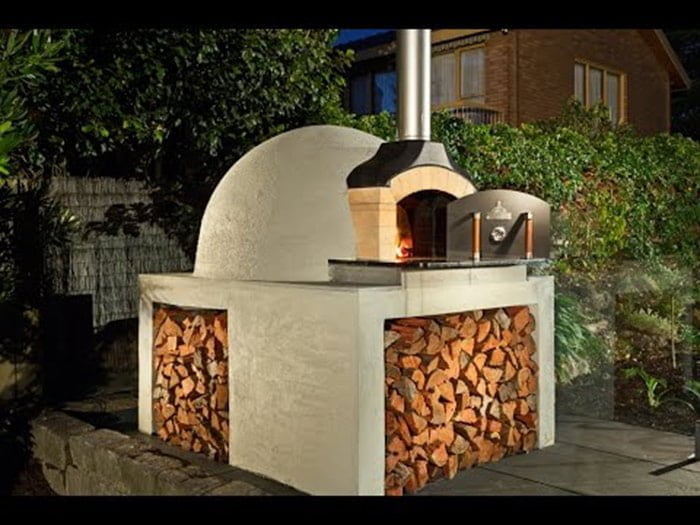
This type of outdoor oven is large and made from firebricks so they can withstand high temperatures while also being able to retain heat. A major benefit of having this type of pizza oven is that it’s capable of reaching 500 degrees F (or higher) in just minutes.
Plus, the different types available often come with added features like heavy duty construction, sliding doors, wheels for easy portability, built-in thermometers and much more.
These are far better than using propane grills because it makes the whole process easier; you only need to be concerned about prep work and making sure your ingredients are fresh before placing them inside the hot oven.
Outdoor pizza ovens use two different types of materials in order to bake pizzas properly.
First, there are the bricks in which the actual fire will be made in order to heat up the dome-shaped metal construction above. Then there are metal sheets on top of it that help reflect and retain heat inside the dome so that when you put your pizza inside, it is cooked to perfection.
This baking process is also what gives the pizza a slightly smoky flavor that you can’t get from cooking it at home or inside a conventional oven.
What You Need To Know About Outdoor Pizza Ovens
Pizza has become one of the most popular dishes worldwide, but few people are aware that you can get it cooked in an outdoor pizza oven.
These types of ovens use intense amounts of heat in order to cook your food at very high temperatures, making them perfect for cooking pizzas among other things like breads and pastries.
Most brick-built outdoor pizza ovens consist of several different layers which include bricks used as insulation on the inside of the oven cap.
They tend to absorb plenty of moisture which builds up over time while baking your food, so these need to be removed with a small vacuum cleaner or by hand with a brush after each use.
It’s also good practice to check if there are any cracks present because excess moisture can cause serious damage if it seeps into the cracks because it will erode the structure of the oven over time.
This is why it’s essential to use firebricks if you don’t want your oven to crack prematurely, but even these bricks need regular maintenance so they can last as long as possible.
The good news is that these types of bricks are surprisingly affordable because you only have to pay for one set instead of several other materials which require more labor-intensive construction.
Even though outdoor pizza ovens might look simple at first glance, they actually go through a lot of wear and tear during their lifetime which is why we recommend using firebricks.
If you’re not sure whether or not this type of brick will work your oven, make sure to talk to your local bricklayer and ask them for their opinion.
Now do you want to own an outdoor pizza oven? To know how to build an outdoor pizza oven, keep reading…
How To Build An Outdoor Pizza Oven
Building an outdoor pizza oven requires several types of materials. The first one is obviously the bricks to build the actual oven, metal sheets for the cap and clay mixed with water so it can act as mortar between each brick. If you need a slightly bigger oven that will withstand hotter temperatures, then you can use firebricks instead of regular bricks.
Since this type of project isn’t incredibly common, we recommend getting help from someone who has experience working with these materials since it’s rather complicated to lay out these bricks in order to make sure they are level or flush with one another.
You also need special tools like trowels and wire mesh cutters which aren’t readily available at hardware stores; plus, having some experience working with material like this will make the job a lot easier. We suggest doing some research online to find bricklayers in your area who can offer their services for a fair price.
The actual oven part of the outdoor pizza oven is made from bricks, but there are other options available if you want something more durable and long-lasting.
For example, you could use firebricks instead because they can withstand high temperatures without buckling or detaching from one another. They also come with a protective coating that makes them rust-resistant and less likely to crack over time.
Another good option would be refractory cement which is basically bricks that have been fused together by heating up at extremely high temperatures so they turn into something similar to concrete.
They might be a little more expensive and they also take longer to transport if you’re buying them online, but they are much stronger than regular bricks.
Other materials you will need include metal sheets for the lid, sanded grout (to fill in gaps between brick layers), mortar mixed with sand (for the oven floor), firebricks (if you go with this option) and clay or soil (for the base of the oven).
If you want your outdoor pizza oven to have an aesthetically pleasing design instead of just being flat, then you can even add artistic touches like exterior tiles or stones that you purchase from any home improvement store.
There are a few steps involved in this project, but they’re all straightforward and easy to understand if you have some experience with building things from scratch. Here’s an overview of how to build an outdoor pizza oven:
Materials needed
The first but also very important thing in the project of how to build an outdoor pizza oven, you need to prepare some tools and materials.
The tools you’ll need to build your own pizza oven will depend on the design and materials that are used. However, these basic hand or power tools are necessary for any project big or small in size- plus they make things easier when working with wood!
- Tape Measure – so you can take accurate measurements of where you’ll be placing your oven and work accordingly
- Hammer – a sturdy hammer with a strong head is strongly recommended for this type of project. Most hammers come in various sizes, heads, and weights depending on the intended use. Nailing wood or metal sheets together? You’ll probably need a heavy duty hammer- while builders will need something lighter
- Circular Saw – the circular saw works great on lumber because it allows you to cut through several pieces at once without needing to change the position of your blade size
- Square level/straight edge – these are used to check if surfaces or objects are straight. The square level or straight edge will help align boards that need to be laid down flat or in a straight line
- Compass saw – the compass saw cuts shapes into wood, which is particularly useful when cutting arches. The blade of the compass saw has adjustable teeth so you can set it to whatever size you need for your project
- Safety glasses – safety glasses protect your eyes from abrasive particles and flying materials while working on your outdoor pizza oven design. You should also wear gloves, earplugs, and other protective clothing when working with certain chemicals like cement unless otherwise stated
- Work Gloves – to prevent injuries and protect your hands from materials and chemicals. You could also consider wearing disposable gloves for this project.
- Hearing Protection – if you’ll be running loud power tools like a saw or sander, then earplugs will help ensure you don’t damage your ears
- Dust mask – if you’ll be doing outdoor work in dusty conditions then a dust mask is ideal for keeping all sorts of microscopic particles out of your mouth and nose during the building process
- Chalk line reel/chalk line – this tool helps keep measurements straight by marking boards that will be laid down horizontally or at an angle
- Jigsaw/tubing cutter – these are ideal if you’re planning to build curved surfaces on your outdoor pizza oven
- Tuck Pointer – this tool helps you create crisp and clean 90 degree angles
- Attack Head – used for outdoor projects like digging or cutting into different materials. Generally speaking, higher-end power tools can get these come.
- Dril – used for drilling holes into concrete, brick, stone and other surfaces
- Hacksaw – a preferred saw of most people because it cuts on the pull back. This type of saw has a thin blade that’s ideal for cutting into metal, screws or bolts with a smaller head
- Trowel – used to apply adhesive materials like cement onto different surfaces like bricks or tiles when building your outdoor pizza oven design Plans To Build A Simple Oven It’s advisable that you build your own outdoor pizza oven in this manner if you want it to be simple- plus it will also be cheap!
Depending on the materials you’ll need for your project, they are likely to include:
- Exterior grade plywood
- Clay Bricks
- Fire Bricks
- Concrete mix
- Cement mixer or large tubs for mixing
- Natural stone
- Concrete blocks
- Vermiculite (insulation)
Those are the basic tools and materials for reference, depending on your project, you can adjust accordingly.
Detailed Instructions On How To Build An Outdoor Pizza Oven
Here is a step-by-step guide on how to build an outdoor pizza oven:
Step 1: Choose A Location
To get started, you’ll first need to find some land which is flat and suitable for building an outdoor pizza oven. It needs to be at least 4 meters (13 ft.) by 8 meters (26 ft.), but larger ovens are always better since they allow you more space to work with.
Make sure that the ground is stable and doesn’t have any inclines or declines which might make it difficult to use. If possible, try finding a spot out in the open instead of on the edge of the forest where natural sunlight won’t be blocked by trees or bushes.
If there aren’t any structures available, then set up stakes in the ground about 2-3 feet apart all around the perimeter of where you plan to build your outdoor pizza oven.
Use some string lines to connect them like a grid so you can keep things organized throughout this project (you don’t want anything crooked!)
Make sure to clear an area for your outdoor pizza oven by removing any stones or debris from the ground so you can begin laying out the foundation for your brick dome.
A typical base will feature four layers of bricks with two inches worth of space in between each layer. Additionally, there should be half an inch worth of space on either side of the brick dome.
Lay down landscaping fabric over the area by tacking it on with nails at regular intervals (at least 1 foot apart) so that it covers the grass or soil underneath.
The fabric will act as a barrier to keep grass and weeds from growing under your outdoor pizza oven, which would be an eyesore when you’re cooking outdoors.
Step 2: Plan Your Project
It’s best to observe and measure your outdoor area before doing anything. Mark out the area for where you want to build your oven. Take accurate measurements, mark them down on a piece of paper, and then sketch your plan for the building process if needed.
Set aside a budget that will cover all materials including insulation, concrete mix, concrete blocks, clay bricks or natural stone depending on what you’ll need- if applicable.
Step 3: Setting Up Foundation For Outdoor Pizza Oven Base
After measuring your project site, calculate where you should start laying down boards that will be used as the foundation/flooring of your outdoor pizza oven.
Using wood screws weighing at least one pound per board section (three inches in length) connect the boards together to form a solid foundation for your project.
If you’re not sure how wide your oven should be, then calculate it by multiplying one width of brick (not including mortar gaps) with two, add an inch and divide the total results by six. The answer you get will give you the measurement of bricks on each side of your oven if they were laid out next to each other without any mortar or gaps.
Once you have a level area for your outdoor pizza oven, it’s time to start setting up the foundation for the base of the pizza oven. The first level will be made out of eight-inch clay bricks laid in an eight-shaped pattern just like what you would use to build a firebox base.
Make sure that there’s about one inch between each layer before laying another layer on top of it. Repeat this process until you’ve reached your desired height for the foundation/base.
Step 4: Build Grill For Outdoor Pizza Oven
Once you have your foundation down, its time to attach a grill rack for placing pizza stones on top of once you’re finished with construction.
This particular project calls for expanding upon what was already built using four long beams of wood that are 2.5 inches thick, 8 feet in length and about an inch shorter than the height of your oven’s foundation.
Once you have these pieces ready, lay them down next to one another with two on each side so you can connect them all together to form a cross shape.
Make sure that everything is level, nail boards onto the ends where they intersect so that it forms a sturdy structure for grilling food or cooking pizzas once you’re finished. This will be the platform to place hot stones over when cooking your favorite pizza recipe.
Step 5: Build Outdoor Pizza Oven Hood
For this particular project, its best if you use bricks to make the hood instead of concrete blocks.
If you don’t have the necessary tools needed to cut bricks, then you can always search for a brick supplier in your area that cuts them to size. Normally this will be done free of charge or cost very little depending on how many bricks are used.
Step 6: Build Outdoor Pizza Oven Dome
The structure of your dome can be made out of clay bricks (one-inch thick) laid in a circular pattern just like the foundation/base of your outdoor pizza oven. Remember to measure each layer before laying down another one on top of it.
Make sure there’s an inch gap between each layer before laying another layer on top, just like with the firebox base. Repeat this process until you’ve reached your desired height for the oven dome.
Use 1/4 inch worth of mortar in between each brick to ensure that they are securely locked into place. Once you’ve reached your desired height, spray water all over the structure before taking it indoors for at least 24 hours (to make sure it dries properly).
Step 7: Build Firebox For Outdoor Pizza Oven
Using fire bricks, lay them out in four different directions forming an eight-shaped pattern (two brick layers thick).
Make sure there’s enough space between each layer before laying another layer of bricks on top of it that has some space for insulation material like vermiculite or perlite. Gaps between each layer should be less than one inch wide.
Repeat this process until you’ve reached your desired height for the firebox base. Cover the entire structure with sheet metal – overlapping joints by about two inches Seal up any seams using silicone sealant.
Step 8: Install The Chimney
Using nine sections of metal roofing for both the inside and outside sections, cut each piece to six feet in length (6 inches longer than what you need). You can find this material at your local hardware store.
Next assemble the pieces together so the seams are overlapping just like before using silicone sealant.
If you’re not familiar with how to put these kits together, then all you have to do is measure out where you want your line then use a straight edge ruler while drawing on it with a pencil.
After that, start cutting small 1/4 inch deep lines along your drawn line until you’ve reached about halfway through. Bend back the metal piece, then continue down the entire length of it until it snaps apart from being cut through.
Step 9: Make Door For Outdoor Oven
You’ll need two doors- one for accessing the inside chamber and another for placing fuel (wood) inside the oven when needed.
For the door frame, lay down four boards that are 2.5 inches thick and six feet long so they form an X shape at both ends where it intersects with other pieces. At this location, place two boards across horizontally using nails to secure them together tightly then put
Using 1/4 inch plywood (that is 5 inches thick), start off by cutting out the door dimensions (if you don’t know how to do this, you can ask someone at your local hardware store if they could help).
Make sure that there’s enough room for insulation around it before screwing it down into place using two-inch long screws.
Using plywood cut into a rectangular shape and lay down some insulation before laying some cement mix onto it and smoothing it out with a trowel until flat and level.
After the cement dries, lay stone on top of this layer to give the oven a hard and strong surface to cook with. Place a handle on top of this door for easy opening and closing access.
Follow this same process right beneath the top of the oven where you’ll be installing a small wooden section that will act as your smoke box.
Then use fiberglass insulation all along the joints between each boards so no smoke escapes during use. If you want to make the door water proof, coat both sides with polyurethane on the inside then on the outside.
Step 10: Build Outdoor Pizza Oven Lining
The next step in the instruction on how to build an outdoor pizza oven is to build the lining for your outdoor pizza oven since this will help retain heat inside while also providing an additional barrier against debris and other outside factors.
The best way to go about doing this is by building a six-inch thick mixture of firebricks throughout the inside area of your outdoor pizza oven. This should be done in a circular pattern starting from the top en route to the bottom (to give it additional support).
Step 11: Adding Wood To The Outdoor Pizza Oven
Having the ability to control your airflow inside your outdoor oven is mandatory if you want to cook anything without burning it.
By inserting metal vents on opposite sides of the dome structure (one vent high and one vent low) you can be able to maintain proper cooking temperatures with ease.
Step 12: Finish Building Outdoor Pizza Oven
Once all of your materials are ready to go, it’s time to start assembling everything together using masonry screws (for added strength).
First assemble your oven base following these instructions carefully so you don’t mess up along the way. Then follow this same process by building up your oven dome all of the way until you have completed it.
After that, be sure to build up each side of your firebox right underneath where the chimney will be installed after that is done being built. Before you know it, you will have successfully finished how to build an outdoor pizza oven!
Your finishing process will involve adding two inches worth of insulation around your firebrick lining. The best building materials used for this purpose are cement, brick dust and vermiculite which can all be bought at any hardware store.
Some people prefer using castable refractory cement because it doesn’t require too much preheating time before use.
Your next step is to apply a layer of cement to your outdoor pizza oven base before placing the first row of eight-inch clay bricks on top of it. Remember to use 1/4 inch worth of mortar in between each brick for added support.
To give your outdoor pizza oven an aesthetically appealing look, it’s best to apply stucco all over the cement-covered dome (both the front and back).
You should also consider adding a layer of mortar on top of the clay bricks that are surrounding your outdoor pizza oven. This will help improve their durability as well as provide an aesthetic appeal for your oven.
Step 13: Enjoy Outdoor Pizza Oven Cooking
Now that you have completed with how to build an outdoor pizza oven, let’s start enjoying your pizza party.
After your oven has been completed and tested to be in working order, you can use a combination of wood and charcoal for cooking most anything from appetizers, entrées, sides and desserts. There are countless recipes you can try out or come up with on your own! Bon appetite!
This is what it should look like before firing up the first batch of pizzas! As you can see, making your own custom built brick pizza oven at home can be quite easy, so long as you have everything required by following our step by step instructions on how to build an outdoor pizza oven.
Once you’ve fired up your first batch of pizzas, the hard part will be letting everyone try some because they’ll definitely keep coming back for more! There are countless recipes you can try out or come up with on your own! Bon appetite!
If you need help on finding the best outdoor pizza oven for your 2022 pizza party, check this guide: 14 Best Outdoor Pizza Oven For 2022 (Our Tested Result)
The Benefits Of Having A Pizza Oven Outside Your Home
If you are a pizza lover and want to make your own pizza at home, owning an outdoor pizza oven is great. Now that you know how to build an outdoor pizza oven, let’s take a look at some of the amazing benefits you haven’t known about an outdoor pizza oven.
What Are The Benefits Of Outdoor Pizza Ovens?
There’s really no limit as to what you can cook in an outdoor pizza oven, but we recommend starting with the most popular food that people enjoy: pizzas. You will need a suitable dough recipe which calls for yeast, flour, sugar and some olive oil at a minimum.
Once you’ve made the dough, roll it out into a thin sheet and place it on a wooden peel before adding toppings of your choice directly onto the surface along with some grated cheese sprinkled over everything.
Then slide the whole thing into the preheated oven by tilting the wooden peel until all of your ingredients are inside.
Make sure to keep the oven door closed throughout the cooking process so you get a nice, even bake which will result in a crispy dough and perfectly melted cheese.
Plus, outdoor pizza ovens tend to cook your food much faster than traditional indoor ovens because they use intense heat that can reach temperatures of up to 1000 °C (1832 °F).
Another thing you might want to make is flatbread-style breadsticks by cutting a slab of dough into thin strips after it’s risen for some time.
These can be great with dips like hummus or pesto sauce and they taste amazing when cooked until they’re crispy on the outside but still soft enough inside.
If you don’t have any recipes ready then we recommend using your oven for anything you can imagine because it’s capable of cooking just about anything.
The traditional brick and metal design of an outdoor oven is very similar to how wood-fired pizza places make pizzas. They normally use a mix of high heat, special ingredients and cooking times to cook the perfect pies.
However, you don’t need all that if you just want to try your hand at making one for yourself! Here are some benefits:
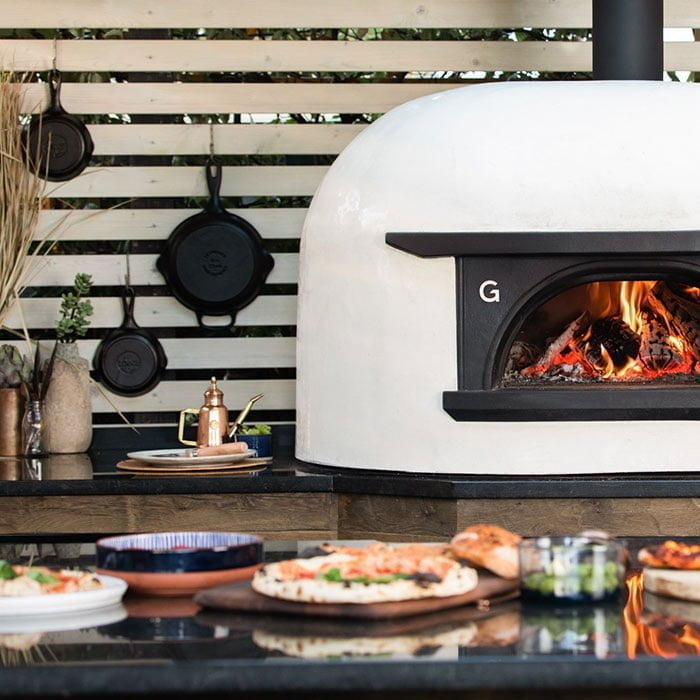
1. Great Flavor – Unlike using your regular oven or propane grills, these types of outdoor ovens give off a smoky taste which makes everything taste so much better! Once you get started with it, we’re sure you’ll find yourself cooking more things in it than just pizzas.
2. Better Bake – Pizza stones are often used in order to create the perfect crust when making homemade pizzas, but what if you could skip all of that and get the same results?
The brick material inside these ovens helps retain heat which creates a crispier exterior to your pizza dough once it’s baked!
3. Easy To Use – It doesn’t get any easier than using an outdoor oven like this one. All you have to do is build a fire using the bricks and wait for about an hour or two before enjoying a delicious, perfectly cooked pizza pie!
What Are The Drawbacks Of Having One?
So, you already know the benefits of owning an outdoor pizza oven and how to build an outdoor pizza oven. However, owning a pizza oven also brings some limitations.
Having an outdoor oven may seem great at first glance, but there are a few drawbacks. For one thing, this type of oven is usually very large and takes up a lot of space where you would normally park a vehicle or place other outdoor appliances.
You’ll also want to have enough room for your fire bricks so that the inside can retain as much heat as possible – especially if you’re planning on making pizzas often.
Another drawback is the time it takes to preheat before actually starting to cook anything. The traditional brick-and-metal design that these ovens come with doesn’t allow them to heat up as quickly as standard kitchen ovens.
This means that from start to finish, including the actual cooking time, a pizza will take about an hour and a half in order to make properly!
While some may like the fact that nothing beats a freshly cooked pie, others might not see it as an issue and would rather use their conventional oven for faster results.
Useful post: How Much Are Pizza Ovens?
Recipe For Homemade Pizza
After following the instructions on how to build an outdoor pizza oven, you have got an outdoor pizza oven. If you don’t know what to cook and how to start, here are a few suggestions to help you create a delicious pizza like at a restaurant.
Another great thing about outdoor ovens is that you can cook just about anything inside of them, not just pizzas. Over the years we’ve discovered all sorts of things you can make using these cooking appliances and they’re easy to prepare once you get started!

One of our favorites is homemade pizza which has a really crispy crust and tastes amazing with tons of cheese on top. Here are some basic steps to help you get started with making your very own homemade pizza!
1. Start By Mixing Your Own Pizza Dough
You can easily buy pre-made dough at the store, but it won’t taste nearly as good if you use something that’s already made ahead of time. We recommend using a stand mixer instead of mixing everything by hand because it’ll come out much fluffier and airy that way.
Once you’ve reached the correct consistency then just wrap the dough in some cling film before sticking it into the fridge for about an hour or two in order to chill.
2. Prepare The Toppings
If you want to add anything like meats (pepperoni, sausage), onions, peppers and tomatoes then make sure to cook them beforehand to help get rid of the excess fat before cooking.
This will also prevent it from seeping into your pizza dough while you bake it, giving it an unwanted taste that will ruin everything!
3. Add Some Flavor
One great trick to making a good homemade pizza is by adding garlic butter sauce onto the top while baking. Just melt some butter and add two crushed cloves of pre-minced garlic in order to create this tasty mixture that really brings out the flavor in just about anything!
You can also try other combinations like pesto or olive oil instead so experiment with different options until you find something you like!
4. Prep The Oven And Fire Bricks
Once your toppings are done and you’ve got your dough all set to go, it’s time to preheat the oven and fire bricks. Aim for an internal temperature of around 220 degrees Celsius if you want a crispy crust that’s not overdone or burnt on the bottom.
5. Bake The Pizza
After about 40 minutes of wait time, now is when the fun begins! Carefully slide your pizza onto one of those handmade wooden paddle boards before gently placing it inside the outdoor oven.
Make sure to check on it every few minutes after roughly 30 minutes have passed in case any spots look a bit too browned or charred – this is how you know it’s done!
6. Remove And Enjoy
Once you’ve removed your freshly cooked homemade pizza from its heat source, slice it up and enjoy while still nice and hot!
The great thing about this setup is that you can make more than 1 pizza at a time if you want, allowing you to cook for your friends and family whenever you get the chance.
That is all there is to it! Just remember to take your time, use the right amount of ingredients and experiment with different combinations until you’ve achieved something that everyone will love.
Not only will this help with your cooking skills but most importantly, with your overall motivation to try harder, be better and always strive towards success even in the smallest ways!
Conclusion on How To Build An Outdoor Pizza Oven
The use of an outdoor pizza oven can enhance the experience and enjoyment of cooking. This is why it’s important to get a proper one that suits your needs before making any purchase decisions.
There are many benefits to having an outside oven, including being able to cook pizzas in less time than if they were cooked inside because you don’t have to heat up the kitchen and risk burning food on the stovetop.
Because these units require more space, we recommend getting one with higher BTUs for better heating capabilities. This will also ensure that you’ll be able to bake pies at hotter temperatures without worrying about them drying out or becoming burnt too quickly.
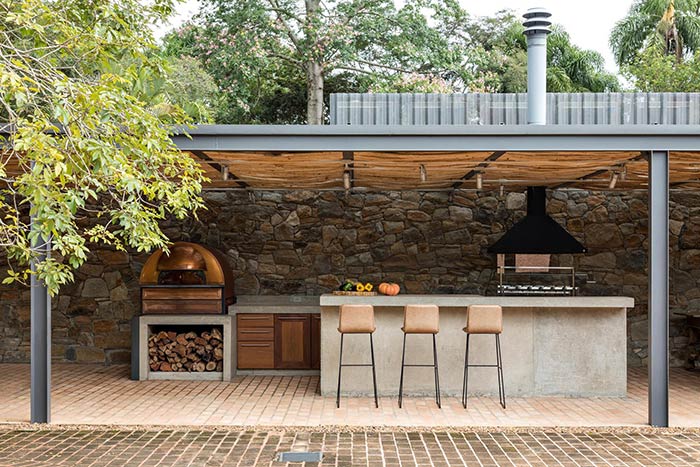
If you’re looking for a new way to enjoy entertaining guests outdoors while showcasing your cooking skills, then a wood-fired brick or stone oven is ideal for you.
When you have a pizza oven outside your home, it’s like having an additional kitchen. They can be used for more than just cooking pizzas and there are many benefits to adding one to your outdoor space.
For example, the dough will rise faster in warmer temperatures and if you make bread or other baked goods on occasion, you don’t need as much room inside since the temperature is usually higher outdoors anyway.
Regardless of what type of food you enjoy making at home (or wanting to learn how) we hope that this blog post has given you some great ideas about why investing in a pizza oven would be beneficial for any family’s lifestyle, as well as how to build an outdoor pizza oven!
“If you’re a pizza lover, then this is an investment that will pay off in the long run. You’ll be able to enjoy fresh homemade pizzas with all your friends and family.”
In conclusion, building your own pizza oven is a great way to add some joy into your backyard. If you follow the steps we’ve outlined in this blog post on how to build an outdoor pizza oven, it’s possible for anyone with basic carpentry skills and a little patience to build their very own outdoor pizza oven!
Read more:
Top 13 Best Outdoor Pizza Oven


