 & Tips")
How To Season A Pizza Stone? (Follow These Steps)
There’s nothing quite like a piping hot slice of pizza, fresh out of the oven. But if you’re like most people, you’ve probably had the unfortunate experience of an undercooked or burnt pizza.
That’s where a pizza stone comes in handy! In this blog post, we’ll teach you how to season a pizza stone properly so that you can enjoy perfectly cooked pizzas every time.
Plus, we’ll share some tips on how to make the perfect pizza. So read on and get ready to create your very own masterpiece!
What is pizza stone?
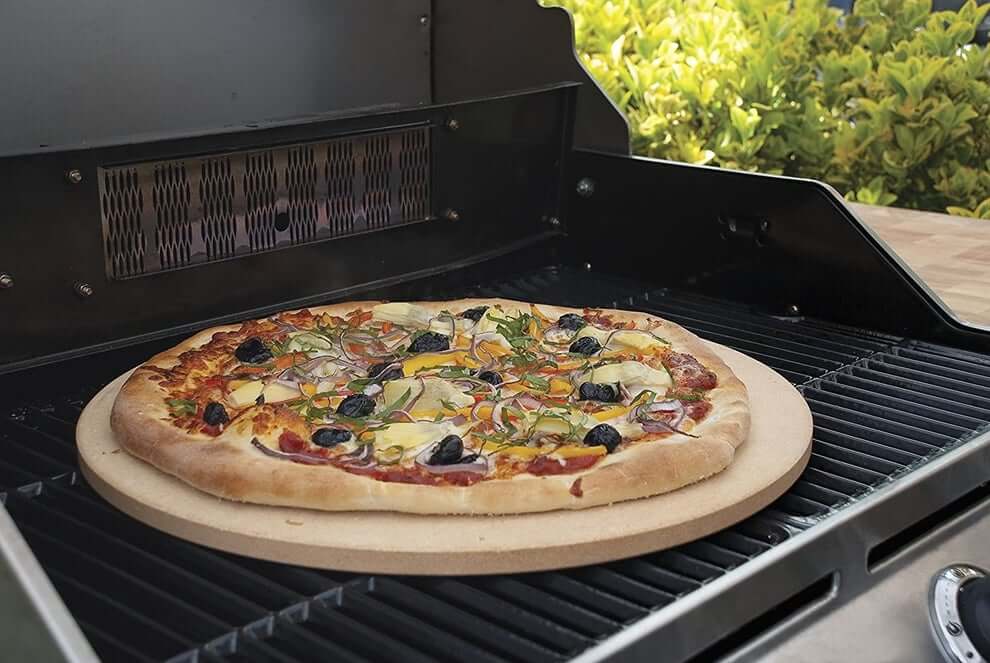
A pizza stone is a large, flat rock or clay slab used in cooking pizzas or breads. It absorbs moisture from the dough to ensure that the crust stays crisp and cracker-like.
It can be made of several different materials, including steel, ceramic, or stone.
Some people even use unglazed tiles!
However, experts agree that stone is the best material for baking pizza since it evenly distributes heat and keeps moisture out of your crust for maximum crispness.
What does it do?
The purpose of a pizza stone is to create super crispy crust by absorbing moisture from the dough while it bakes so that little steam bubbles are formed inside which also cause cracks on the surface of the finished product.
This ensures that the end result is crispy, firm yet not tough crust which is very desirable when it comes to pizza.
Another purpose of using a stone is that during baking process when the dough rises, the air inside gets trapped underneath by virtue of porous nature of fresh dough and when this happens within the oven (whereby heat has already been applied) it creates a unique type of oven spring where the gas expands under high pressure.
This method rather than just allowing released steam escape from open ends if had been left on a regular plate or tray results in light fluffy dough with large irregular shaped hole.
Another advantage of using a stone is even distribution of heat throughout the surface so there are no cold spots where food may get overcooked while other areas may remain undercooked or raw.
What is exactly seasoning a pizza stone mean?
When you get a new pizza stone, the first task is to season it properly. This allows the stone to absorb moisture so that it can create crispy crusts when baking pizzas.
If not seasoned, your pizza’s will become soggy in parts while remaining undercooked or burnt in others.
It should be noted that seasoning does take some time and for this reason buying pre-seasoned pizza stones is recommended if you’re looking for optimal results without much fuss.
Also, note that stone ovens come with their own instructions which you should follow carefully since they are designed to work at maximum efficiency when used correctly.
How to season a pizza stone: Prepare Step: What do we need?
Although it sounds complex, seasoning a pizza stone is actually incredibly easy! You’ll need the following items to get started:
- Pizza stone (can be found in most supermarkets, kitchen supply stores or online)
- Fine sandpaper
- Oven cleaner spray (optional)
What you need to do?
Once you have your ingredients ready, there are just three steps that you follow when seasoning a pizza stone. First, ri
nse your stone with water and dry it thoroughly. Shake off excess moisture but don’t use any soap since the residue will prevent your crust from sticking to the stone later on.
Next up, sprinkle some fine sand over the surface of the stone and rub it all over so that there’s an even coating covering every part of the surface.
Finally, place the stone in the oven and turn it on to about 220-250 degrees fahrenheit.
Leave it to heat up for one hour – this will allow the stone to become truly seasoned and absorb all moisture.
Once ready, turn off your oven and leave the stone inside until cooled down before removing. You can then repeat these steps if you’d like a thick crust or just use as is if you prefer a thin crust pizza.
What shouldn’t I do?
You should avoid using soap since it won’t be washed away completely after rinsing and may create some residue which will result in tough pizza dough later on.
Also, avoid washing with water hotter than 130 degrees fahrenheit as this may cause cracks or other damage to the surface. Please make sure you allow the stone to cool down before removing or placing it in water.
Why should you season your pizza stone before using it?
Seasoning a pizza stone improves its heat-retention abilities, which means better crisping of your crusts. Also, seasoning helps prevent the leaching of raw food materials into the seasoned material.
In other words, you won’t be eating a bit of oil with your first bite of pizza! Seasoning also provides some protection from damage by acidic or alkaline foods.
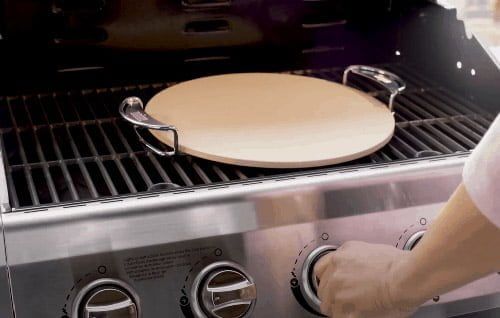
So, how to season a pizza stone correctly? The process is simple: Apply a thin coating of vegetable oil to the surface and place in a preheated oven at 500 degrees F for one hour.
When I season my 16″ baking stone, I simply lay it on top of two burners on my stovetop (see below).
Alternatively (and more safely), you can put it right on an oven rack. Turn the oven off, go have a beer or watch TV, then come back later and shut it all down.
The stone should be cool enough to handle after an hour or so.
James’ jimmy rigged method of seasoning his 16-inch pizza stone on top of two burners (he can also do two stones at once like this).
The pizza stone is balanced on inverted pie tins (with spray oil) that are resting on the back burners – thus elevating it well above the source of heat!
Seasoning larger baking stones using this technique may require more weight (such as full propane tanks) for adequate heat transfer.
You will want to repeat this process a couple of times. You can bake bread on your stone right after you season it (just dust it with some cornmeal and throw the dough directly onto its surface), but give it at least one more seasoning before baking pizza.
I like to season my stones prior to boiling for extra protection against leaching, though that’s not necessary if you’re using PAM or other water-based sprays.
If you intend to brush your crusts liberally with olive oil as we do at my restaurant, you should still go ahead and season your stones first so they won’t be diluted by raw food materials…unless, of course, you don’t mind eating a little raw dough now and again!
How to season a pizza stone in more details? Step-by-step instructions
Step 1: Scrub it down, then heat it up
Once you receive your new pizza stone, it is wise to remove the protective oil coating on the stone that was applied during manufacturing.
This can be accomplished by washing with mild soap and warm water, then rinsing thoroughly.
Give the stone a scrubbing if needed to remove any dust or debris from its package.
Next, place the stone in a cold oven and allow it preheat for one hour at 500 degrees F . After heating, turn off oven and let the stone cool down before removing from oven.
If your new stones does not come with instructions on how to season it, please see our pizza stone seasoning article.
Step 2: Apply a thin layer of oil to the surface (optional)
Once your stone is seasoned, you may apply a thin layer of cooking oil (olive or vegetable is recommended) to keep it seasoned longer.
Simply brush on an even coat and allow the oil to soak in for 10 minutes before wiping off excess with paper towels.
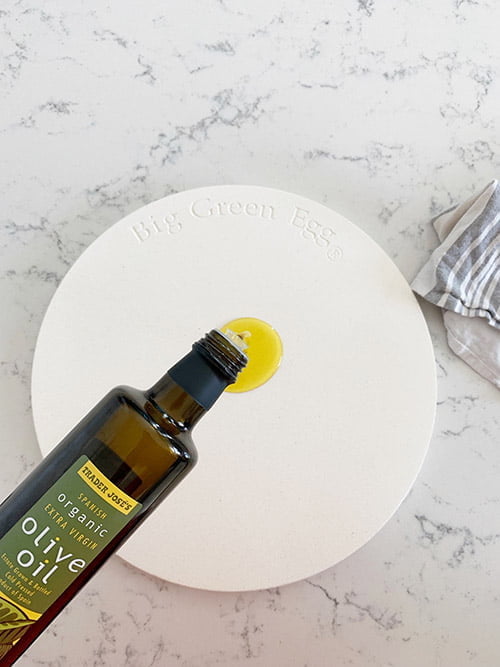
This step is optional but will not only help season pizza stone faster, but also give it more non-stick properties in future use.
If you don’t plan on using it for awhile in between uses, we recommend applying at least one coat every time you preheat before baking. Even if you’re placing food directly on the stone, it will still prevent your stone from drying out and cracking.
Step 3: Make sure to store your stone properly (if you don’t use it regularly)
If you’re not using the pizza stone on an almost daily basis, we recommend wrapping up in heavy duty tinfoil after each use.
This way, it can soak up any moisture that may cause damage over time if left exposed during long periods of time between uses.
If there is noticeable moisture or grease buildup present after storing for a longer period of time, simply re-season by following steps 1-3 again before its next use.
Let’s face it folks…dry stones suck! After all, who wants to run their oven at 500 degrees F just to bake some bread?
How to season a pampered chef pizza stone
A pampered chef pizza stone is meant to be used on your grill. The top rack of the oven will also work, but not as well as the grill, so I didn’t test it.
Pizza stones are porous and release small amounts of minerals into your food. This can affect flavor and isn’t considered safe by many health departments (see here ). To remedy this problem you season it according to these instructions , using oil and salt:
My first attempt at seasoning was with vegetable oil–just plain olive oil that I happened to have open in my kitchen already. It turned out fine, but left lots of residue on my stone.
Some people recommend cornmeal for some reason…which seems weird because any traces of corn that doesn’t burn away would probably be bad.
After some research, I found that people recommended using salt for seasoning instead of oil. Vegetable oil has a high smoke point of 420 F, but salt starts to burn around 350 F…so by seasoning with salt you are getting it hot enough to actually cure the stone.
Not only that–using oil makes your stone greasy. And who wants leftover residue on their food?
Salt is also something you might want in your diet anyway and it will add trace minerals to your food as well!
I don’t have pictures or instructions for this part because there were no instructions online and I wasn’t sure how long to leave the salt on there and what temperature to use…
So maybe someday I’ll try it again, but if so I will post instructions here.
I used kosher salt because it contains no anti-caking agents or iodine (which can affect flavor and be unhealthy).
No need to buy expensive “pizza salt” either. Salt is salt! It’s also cheap–about $1 for a huge jar of it. I used about 1/4 C total on the whole stone, maybe more:
This was after one coat:
You can see that this definitely works and the stone actually is cleaned and cured now and ready to use!
After several uses we’ve found that we need to do this seasoning step every few months to maintain the unseasoned clean state of the stone. That is good because it means we’re not constantly adding mineral deposits.
You can use a clean wet rag after each use to wipe off any excess food particles and I always use tongs when picking up the stone so as not to scratch it.
This thing is very sturdy! It will last for years and years…if you buy one, treat it well and enjoy many amazing pizzas!
Happy pizza making everyone!
Tips for seasoning pizza stone
Seasoning your pizza stone or baking steel is extremely important to the finished product, but it’s also pretty easy to do. Now you get step by step guide on how to season a pizza stone for the perfect output, we’re going to give you some extra tip to make this stage pretty good.
Here are some tips on how to season your next baking steel…
#1 – Put some parchment paper over your oven rack if it doesn’t already have one. You can pick up an inexpensive roll of parchment paper at most supermarkets or dollar stores.
A cooling rack will also work too if you want another option since it’s a bit easier.
#2 – Heat your oven to 450F just like you’re going to bake something.
#3 – Remove the baking stone from the oven and place it on top of your parchment paper or cooling rack.
It’s usually too hot to handle so you’ll want to use some mitts, potholders or oven gloves when handling it at this point.
#4 – Using a dry brush coat the entire surface of the baking steel with some cornmeal (if you don’t have any just run over to a bakery and snag a small box).
(Don’t get fancy here and think that using flour makes for better coating; trust me on this one, stick with cornmeal.)
#5 – Flip it upside down and repeat step #4 coating it on both sides. Your pizza stone is now ready for your favorite dough or pizza.
(If you have a side lip, repeat step #4 on the sides of the baking steel too.)
#6 – Once you’re done with this just store it right side up until next time. I always keep mine inside my oven so that it’s not one more thing I have to worry about moving around.
If you don’t have that kind of space go ahead and put it somewhere where an errant roll or swipe from a dough won’t damage it (inside a cabinet, under a bed or in storage bn).
That’s really all there is to seasoning your pizza stone! It sounds like traditional seasoning is something new to you since we receive questions like yours fairly often; I hope this was helpful!
Does a Pizza Stone Need to Be Seasoned?
Yes, always sand with a generous amount of cooking oil and heat in oven for 10-15 minutes. With each use, be sure to sand and heat again to prevent staining/tarnishing.
Note: If you do not want to season your stone (some people don’t like the taste), apply a very thin layer of cooking spray before each use. This will keep food from sticking but does not add additional flavor.
Recipes for pizzas that are best cooked on a seasoned pizza stone
Prosciutto and Arugula Infused Pizza Dough Recipe adapted from Cook’s Illustrated. Original recipe can be found here . Makes 3 or 4 small pizzas (enough for 2-3 people). You can easily double this recipe if you have a stand mixer large enough to handle the dough.
Ingredients:
- 1 tablespoon olive oil, plus more as needed
- 1 cup warm water, plus more as needed
- ½ teaspoon sugar
- ¾ teaspoon active dry yeast
- 2 cups all purpose flour 1 teaspoon kosher salt
Topping Suggestions: Tomato sauce, mozzarella cheese, thinly sliced red onions, arugula leaves, sliced prosciutto
1. In a small bowl combine warm water, sugar and yeast. Allow the mixture to stand until it starts to foam. This should take about 5-10 minutes depending on how warm your kitchen is.
2. Place flour in the bowl of a stand mixer fitted with the dough hook attachment. Add salt to one side of the bowl and create a well in the middle of the flours where you will pour your proofed yeast mixture along with olive oil.
Turn mixer on low speed and mix until combined scraping down sides as necessary (about one minute).
3. Increase mixer speed to medium high and kneed for 7-8 minutes or until dough is smooth and begins to gather on the hook attachment (the dough will start to clean the sides of the bowl). If your kitchen is cool, you may need an additional 1-2 minutes.
The dough should be soft but if it feels sticky add a bit more flour one tablespoon at a time until you get the right consistency. You want your dough to be tacky but not stick to your hands.
4. Coat large bowl with olive oil and transfer dough into bowl, turning once so that both sides are coated with oil. Cover tightly with plastic wrap and allow the dough to rise in a warm place for about two hours or until doubled in size.
5. Punch down risen dough using floured hands or a wooden spoon until the gas has released. At this point you can either wrap the dough in plastic and allow it to rest for another 30 minutes or proceed with making your pizza.
6. Preheat oven to 500°F, placing a rack on the lowest shelf that can handle the heat (usually the top rack) along with your baking steel if using one. Place an empty baking sheet on the next lowest shelf to catch any drippings from your pizza.
Be sure not to overload your oven with pizza stone weight; you want there be room for air flow around everything so make sure you give yourself enough space between pizzas when cooking at once!
7. Spread some cornmeal over a wooden board or countertop near your workstation. If you’re right-handed, arrange your board so you can comfortably work with your right hand. If you’re left-handed, the opposite applies.
8. Knead dough just a bit to release any air bubbles that have formed and divide into however many pizzas you want to make (if making three medium size pizzas I would recommend dividing your dough into four pieces).
Shape each piece of dough into a smooth ball by pulling the sides down and tucking them under until the top is nice and smooth.
Gently push the top of the dough downward to create dimples all over it, rotating as necessary until the entire outer surface is covered with little dents. This helps give extra support to toppings because as you pull or cut slices they won’t fall out as easily.
9. After shaping your dough balls, let them rest for about 10 minutes before stretching them into pizza shapes. If the dough is very elastic and snaps back when you’re trying to stretch it, allow it to rest longer until it becomes more pliable.
10. Stretch out your first pizza crust on a wooden board or countertop using your fingers and palms, gradually working from the center of the dough outward and rotating as necessary so that the entire outer surface is an even thickness (this also helps create a round shape).
Transfer creased by hand or with a rolling pin into one hand while gently stretching out the opposite edge with your other thumb and forefinger until you have the desired size crust.
This method takes a bit of getting used to so if you mess up the first time around don’t worry about it! The pizza still tastes just as good even if it’s not perfectly round.
11. Transfer stretched dough onto a floured wooden board, pizza peel or back of a baking sheet and add your toppings (if you’re using fresh mozzarella make sure you drain all excess liquid before topping your pizza).
Gently shake the “naked” dough onto the top of the pie and pull out from underneath with a large spatula or two (this takes some practice but is essentially like peeling paper off a wall in that you want to take one small area at a time while keeping tension on the crust pulling it away from yourself; be careful not to let it fold in on itself when transferring!).
If your sauce is cold, spread a small amount in a thin layer over the top of the pizza, leaving about a half inch around the edges. You can add oil at this point but I prefer to brush it on after baking so that the crust doesn’t become soggy).
12. Transfer stretched dough onto baking steel or stone using wooden peel and bake for 6-8 minutes until crust has puffed slightly and turned golden brown.
Remove from oven using long tongs and transfer back onto wooden board or countertop (do not stack cooked pizzas on top of each other or they will become soggy – if you need to hold them before eating, cover with aluminum foil but keep them separate).
13. Repeat steps 10-12 with remaining dough, stacking cooked pizzas on top of each other (carefully!) to let steam escape and prevent sogginess; set aside until ready to eat.
Use your creativity when topping pizzas – the only true requirement is cheese! Fresh basil leaves go well with tomato sauce, as do many other herbs like oregano or thyme.
Try using pesto instead of tomato sauce for something different, or sauteed mushrooms and onions, sliced olives…there are tons of possibilities.
14. Serve hot out of the oven with a large salad or fresh fruit if desired..
15. Store leftover pizza in the refrigerator for up to one week or freeze for later use. Reheat at 400F for 10-15 minutes or until crust is crispy once more.
16. Enjoy!
I hope you found this helpful, thanks very much for reading! If any of the steps are confusing just let me know in the comments below and I’ll try to clear it up 🙂
Otherwise have fun learning to make pizza on your own! It’s really easy once you get into a rhythm with it so don’t be discouraged if it doesn’t work out perfectly on your first try…just think of how impressed everyone will be when they find out YOU made the dough from scratch 😉
Note: This recipe results in a very thin crust pizza that is best eaten fresh off the oven – if you prefer a thicker crust simply reduce the amount of water so that the dough is firm enough to roll out with a rolling pin.
If you want to make individual-sized pizzas (which are also fun for kids) divide dough into six balls, flatten slightly and stretch into desired shape before topping; bake for only 5-7 minutes until cheese has melted and center is cooked through.
FAQs about How To Season A Pizza Stone
Is seasoning a pizza stone necessary?
No, seasoning is mostly for flavor. If you do not want to season your stone (some people don’t like the taste), apply a very thin layer of cooking spray before each use. This will keep food from sticking but does not add additional flavor.
Do I need to wash my stone after every use?
It is absolutely essential that you cool down the stone completely (overnight if possible) before washing it or else there will be too much moisture inside the pores of the stone which could lead to cracking when heated up on subsequent uses.
Can I use soap?
Yes, always wash with warm water and mild dish soap – do not immerse in water though! Dry immediately with paper towel or clean rag.
Can my stone crack?
It is very rare but if you find that your stone has cracked, call the company and ask for a replacement.
Will it ruin my stone to leave it in the oven when I’m done cooking?
It is best to take out of the oven after use so that it doesn’t retain too much heat and cause cracking in the future.
If this does happen though, there isn’t any harm done in terms of how it will function as a pizza stone – just make sure not to store in oven while hot!
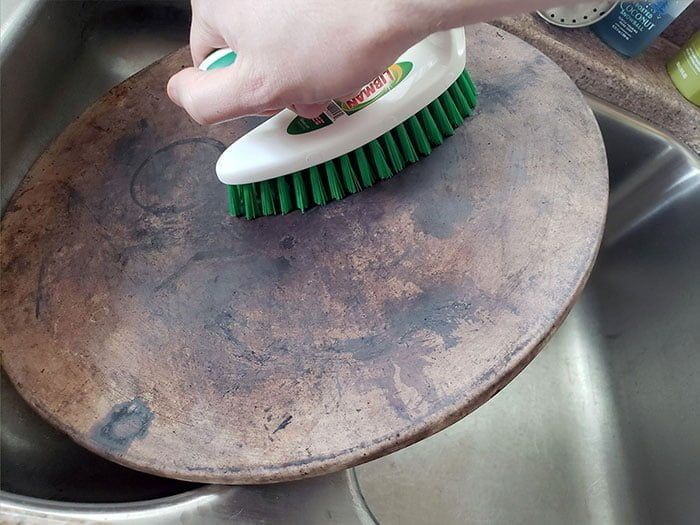
How do I remove burnt food from my stone?
Place unseasoned side down on top of stove burner set to high heat – once hot enough, carefully turn over by flicking onto counter, allowing steam to escape from pores.
Scrape off charred food with a metal spatula and discard. Let stone cool completely before seasoning again or using on stovetop.
FAQs about the process of rolling out dough
How do I roll out my dough without it sticking?
To ensure a non-stick surface, lightly dust your counter top with flour – be generous! Using the heel of your hand, press down in the center of the ball to create an indentation.
Using a rolling pin (or wine bottle if you don’t have one!), roll back and forth along length of dough til you’ve reached desired size/thickness.
Will my pizza stick?
It should not if you’ve rolled it thinly enough – try to work quickly and don’t over-handle the dough. If it does happen to stick, you can always use a spatula or metal tongs to lift it off the counter top and place directly onto your hot stone.
What if I’m cooking on a stove-top?
Cover with a lid slightly ajar so steam can escape from top – this will cause the crust to form bubbles which are tasty when baked once more in the oven!
If there is an excess of moisture in the dough after mixing, allow it to sit out for 10 minutes before rolling. This should eliminate any issues with sticking.
Final Words about How To Season A Pizza Stone
Season pizza stone is an important step in ensuring that your pizzas turn out perfectly every time.
Follow these simple steps and you’ll be on your way to cooking delicious pies for friends, family, or even just yourself!
You now have all the knowledge you need about how to season a pizza stone properly. We hope this article has been helpful in teaching you how to cook a delicious pie without messing up your oven!
If there are any other questions about our articles, please contact us. Thank you for reading and happy cooking!
Further reading
How To Use A Pizza Stone? (A Comprehensive Guide)
How To Sharpen A Pizza Cutter? (Most Effective Way)
Top 100 Amazing & Fun Pizza Facts
")

